


5 Signs Your Wine Cooling System Is About to Fail
Don’t wait for a costly surprise. Wine Guardian Dealer breaks down the top 5 signs your wine cooling system may be failing — and how to fix it before damage...
Jim Hopper
In Stock & Ready to Ship – Order Your Wine Cooling System Today!
Free Wine Cellar Expert Consultation | 📞 Call 1-800-260-1712
Start with a FREE expert consultation on Wine Guardian cooling system sizing, racking options, and the right setup for your space.

Build your dream wine cellar—without costly mistakes or guesswork.
By Jim Hopper, Wine Cooling Expert
Proper wine storage is essential for preserving the quality and value of your collection. A stable temperature (50–60°F) and humidity (50–70%) prevent premature aging and spoilage. Humidity levels for wine storage should be maintained between 50% and 70% to protect corks. Too high humidity can lead to mold growth on corks, ruining the wine. Sealing any gaps or cracks in the cellar is essential to prevent air leaks and maintain stability.
One of the best ways to maintain these conditions is with a ducted split wine cooling system — a high-performance, discreet solution for wine cellars. Proper insulation in a wine cellar is crucial for maintaining consistent temperature levels, ensuring the cooling system operates efficiently.
For a complete breakdown on insulation, layout, cooling systems, and expert design tips, explore our full Wine Cellar Design and Installation: Build a Beautiful, Functional Wine Room That Lasts.
Unlike traditional cooling units, ducted split systems:
✅ Operate quietly – The condenser is installed away from the cellar, minimizing noise and ensuring a peaceful wine storage environment. This is particularly beneficial for wine enthusiasts who want to enjoy their wine room without the distraction of a noisy cooling system. Split systems separate the evaporator and condenser units, leading to quieter operation in the wine cellar.
✅ Are visually unobtrusive – No bulky unit inside the cellar, allowing for a clean and aesthetically pleasing wine storage space. This design choice not only enhances the visual appeal of your wine cellar but also maximizes the available space for storing your wine collection.
✅ Provide precise temperature and humidity control – Ensuring that your wine is stored under optimal conditions, which is crucial for preserving the quality and longevity of your precious vintages. The ability to fine-tune the temperature and humidity levels helps prevent temperature fluctuations and excess moisture, both of which can negatively impact the aging process of wine. With a ducted split system, wine collectors can maintain the ideal environment for their wine bottles, ensuring proper wine storage and protecting their investment. Additionally, the noise level of the cooling unit should be considered if the cellar is near living spaces, as ducted systems are designed to minimize disturbances. Split system units can be placed up to 50 feet away from the wine cellar for installation flexibility. Ducted cooling systems can be installed anywhere adjacent to the wine cellar, including above or below.
Proper management of warm air exposure and circulation is essential for maintaining optimal temperature control in both ducted and split system setups. Ensuring that warm air is effectively vented helps the cooling system operate efficiently and keeps the wine cellar at the desired temperature.
In this guide, we’ll cover:
✔️ What tools & materials you need
✔️ Step-by-step installation instructions
✔️ Best practices & common mistakes to avoid
✔️ How to test & maintain your system
🔹 Need expert advice? Call Wine Guardian Dealer at 1 (800) 260-1712 for a FREE consultation!

Featured Product: Wine Guardian DS025 Duct Split Wine Cellar Cooling Unit
A ducted split wine cooling system is a two-component refrigeration system that keeps your wine at the perfect temperature without taking up space inside your cellar. This system is specifically designed for wine cellars, providing an ideal environment by maintaining consistent temperature and humidity levels crucial for aging wine. Wine cooling units play a vital role in maintaining these optimal conditions, ensuring your wine is stored at the perfect temperature and humidity. Too low humidity can cause corks to dry out, leading to oxidation of the wine. Wine cellar cooling systems are specialized air conditioners designed to maintain proper temperatures and humidity for wine, ensuring the best conditions for long-term storage. Air conditioners are not recommended for wine cellars as they cannot maintain humidity levels.
🌡️ Optimal Environment: Maintains consistent temperature and humidity for proper wine storage.
🌀 Efficient Cooling: Utilizes an evaporator coil to cool air and remove excess moisture.
🔇 Quiet Operation: Evaporator inside the cellar connects to an outdoor condensing unit, minimizing noise.
🎨 Aesthetic Appeal: Eliminates bulky equipment from view, enhancing the wine room’s visual appeal.
💡 Energy Efficiency: Reduces energy costs while maintaining the ideal temperature for your vintages.
🎯 Precision Control: Allows for precise control of desired temperature and humidity levels.
🛡️ Protection: Prevents mold growth and ensures long-term wine storage.
🏠 Versatile Use: Suitable for both residential wine cellars and larger commercial setups.
Whether you’re a wine enthusiast or a serious collector, ducted split systems offer the best cooling solution for safeguarding your wine collection. Split and ducted cooling systems provide more powerful cooling capabilities for larger spaces, making them ideal for both residential and commercial wine cellars.
A ducted split system has two main components:

Features Product: Wine Guardian DS050 Duct Split System Wine Cellar Cooling Unit
📍 Location: Installed remotely in a mechanical room, attic, or another hidden area.
🌀 Function: Cools and dehumidifies the air, sending it into the wine cellar via insulated ducts.
The evaporator unit is crucial for maintaining the desired temperature and humidity levels within the wine cellar. By efficiently removing excess moisture and cooling the air, it ensures that wine bottles are stored in optimal conditions, preventing temperature fluctuations and preserving the quality of your wine collection. The cooling unit should be easily accessible for maintenance and repair.
What's great about the evaporator is its quiet operation, making it perfect for residential wine cellars where you don’t want any noise disturbances. Plus, since it's tucked away in a remote location, you can keep your wine room looking sleek and uncluttered.
📍 Location: Installed outdoors or in a ventilated mechanical room.
🔥 Function: Expels heat from the system, maintaining a stable wine cellar temperature.
The condensing unit is like the unsung hero of your wine cooling system. It’s responsible for releasing the hot air extracted from the wine cellar to the outside world. This efficient heat transfer is key to keeping your wine at a consistent temperature, which is crucial for its long-term storage and aging.
When setting up the condensing unit, make sure it has proper ventilation. This ensures it runs efficiently, cuts down on energy costs, and extends the life of your cooling system. And with flexible installation options, you can choose a spot that fits your space and style, whether you're working with a cozy home setup or a larger commercial space.
✅ Ultra-Quiet Operation: The condenser is outside, meaning no noisy fan inside the cellar.
✅ Invisible Design: Only discreet air vents are visible inside your wine cellar.
✅ Precision Cooling & Humidity Control: Keeps your wine in ideal conditions year-round.
✅ Flexible Installation: Can be installed up to 100 feet away from the cellar.
📢 ⭐⭐⭐⭐⭐ | "Perfect for My Custom Wine Cellar!"
"I wanted a cooling system that wouldn't disrupt my cellar's design. The Wine Guardian ducted split system was the perfect solution—quiet, efficient, and completely out of sight!" — Mark W., Wine Collector
➡️ More on wine storage: Wine Spectator’s Wine Storage Guide

Before installing a ducted split wine cooling system, gather the following tools and materials. It is also important to assess the wine cellar's space and insulation before installation to ensure the system operates effectively and efficiently. A larger wine cellar will require a more powerful cooling unit. Installing a wine cellar cooling unit requires proper electrical connections to meet local codes. Self-contained wine cellar cooling units are typically more affordable and easier to install, making them a viable alternative for smaller spaces or those on a budget.
✔️ Refrigerant line set (pre-charged if using a quick-connect system)
✔️ Insulated ductwork (flexible or rigid)
✔️ Vacuum pump & manifold gauges
✔️ Hole saw & power drill
✔️ Refrigerant leak detector
✔️ Screwdrivers, pipe cutters, and wrenches
✔️ Electrical wiring tools
✔️ Thermometer & hygrometer (to test temperature & humidity)
✔️ Wine Guardian Ducted Split Cooling Unit
🔗 Shop Wine Guardian Cooling Systems
✔️ Copper refrigerant tubing
✔️ Insulation sleeves
✔️ Ductwork connectors and fasteners
✔️ Electrical wiring and conduit
✔️ Condensate drain line
📢 ⭐⭐⭐⭐⭐ | "Easy Installation with the Right Tools!"
"The Wine Guardian system came with clear instructions. I had the tools ready, and the setup was simple!" — David H., Homeowner

Choosing the right cooling unit for your wine cellar is a vital step to ensure your wine collection stays in tip-top shape. Let's break it down in a fun and simple way:
🔍 Types of Cooling Units:
Self-Contained Units: Easy to install and great for smaller spaces.
Split Systems: Perfect for those who want a quieter operation.
Ducted Systems: Ideal for larger cellars, offering efficient and discreet cooling.
📏 Consider Cooling Capacity:
Make sure the unit can maintain your desired temperature and humidity levels. Consistency is key! 🔑
🔇 Noise Level:
If your wine cellar is near living spaces, opt for a quieter unit so you can enjoy your wine room without interruptions.
💡 Energy Efficiency:
Look for units with high energy efficiency ratings to keep those energy costs down. It's good for the planet and your wallet! 🌍💰
🛠️ Maintenance Needs:
Some units need more love and care than others. Choose one that fits your maintenance style and schedule.
By keeping these factors in mind, you can select a cooling unit that meets your specific needs and ensures your wine collection is stored in the best possible conditions. Cheers to that! 🥂

Before you dive into installing your wine cellar cooling system, let's chat about assessing the space where the cooling unit will be installed. Think of this as setting the stage for your wine collection to shine!
🔍 Measure the Space:
First things first, grab a tape measure and check out the size of the space where the cooling unit will sit. It needs to fit comfortably and have some breathing room for proper ventilation.
📍 Choose the Right Spot:
Location, location, location! Your cooling unit should be in a spot where it can efficiently cool the wine cellar without any blockages.
💨 Ventilation is Key:
Proper ventilation is a must for maintaining those perfect storage conditions. Make sure there's enough airflow for the unit to work its magic. You might need to add some vents or fans to help circulate the air.
By giving a little TLC to the space assessment, you'll ensure your wine cellar cooling unit operates like a dream, keeping your wine collection in tip-top shape. Remember, a little planning goes a long way in creating the ideal environment for your precious vintages! 🍷
Choose locations for the evaporator (indoor) and condensing unit (outdoor).
Check ventilation requirements—the condenser needs proper airflow.
Verify power supply compatibility (typically 115V or 230V).
Secure the evaporator in a remote location (attic, mechanical room).
Connect insulated ducts to supply and return air vents in the wine cellar.
Install a condensate drain line.
Place the condenser outdoors (roof, wall, or mechanical room).
Ensure 12–24 inches of clearance for airflow.
Mount it on a stable, vibration-resistant surface.
Run refrigerant lines between the evaporator and condenser.
Use a vacuum pump to remove moisture before charging with refrigerant.
Connect the electrical wiring.
Check for refrigerant leaks.
Monitor temperature and humidity levels.
Adjust fan speeds and settings.
Testing the cooling system involves monitoring temperature and humidity levels over several days to ensure proper operation. Regular testing of the cooling system's performance ensures proper operation and longevity. Condensation on the wine cellar walls indicates that the cooling system may not be functioning correctly and should be inspected immediately.
✅ Best Practices:
Use properly insulated ducts.
Install a dedicated power circuit.
Keep the condenser well-ventilated.
Ensure proper electrical connections to meet local codes during installation.\
Backup power options should be considered during installation to prevent interruptions in cooling.
Use properly insulated ducts.
Install a dedicated power circuit.
Keep the condenser well-ventilated.
Ensure proper electrical connections to meet local codes during installation.
❌ Common Mistakes:
Placing the condenser in an enclosed space without ventilation.
Skipping the vacuum process, leading to moisture issues.
Not sealing duct connections, causing inefficiency.
Check humidity (50–70%) using a hygrometer.
Inspect refrigerant levels every 6–12 months.
Clean air filters every 3–6 months.
Schedule annual maintenance.
➡️ Need expert advice? Call Wine Guardian Dealer at 1 (800) 260-1712 for a FREE consultation!
A ducted split wine cooling system is the best choice for serious wine collectors. Ready to install one?
✅ Shop Wine Guardian Cooling Systems:
🔗 Wine Guardian Dealer
📞 Call for a FREE consultation at 1 (800) 260-1712!

DIY is possible, but professional installation is recommended. Building a DIY wine cellar cooling system can be cost-effective, but it requires careful planning and the right tools to ensure proper functionality and efficiency.
Outdoors or in a ventilated mechanical room.
Clean filters, check refrigerant, and inspect humidity levels regularly.
The ideal temperature is typically between 50°F and 60°F to ensure proper wine storage.
Maintain humidity levels between 50% and 70% and ensure proper ventilation to prevent mold growth.
With regular maintenance, a cooling unit can last 10 to 15 years.
No, regular air conditioners are not suitable as they cannot maintain the necessary humidity levels for wine storage.
Don’t wait for a costly surprise. Wine Guardian Dealer breaks down the top 5 signs your wine cooling system may be failing — and how to fix it before damage...
Jim Hopper
Not every wine cellar needs a humidifier — but many should. This guide from Wine Guardian Dealer helps you understand when humidity control is critical, what goes wrong without it,...
Jim Hopper

Building a wine cellar isn’t like framing a spare room. Even experienced pros make critical mistakes that lead to spoiled wine, mold, or failed systems. In this guide from Wine...
Jim Hopper

Curious what it's like to hire a wine cooling expert? Discover how Wine Guardian Dealer helps collectors avoid costly mistakes and create flawless wine cellar environments. From system sizing to...
Jim Hopper
Protect your wine collection and your wallet. Discover the most common wine cellar cooling mistakes that cost collectors thousands — from underpowered systems to airflow issues — and learn how...
Jim Hopper
Wine cooling systems can cost anywhere from $1,800 to $13,000+. This guide breaks down unit costs, install factors, and hidden expenses you should plan for.
Jim Hopper
Humidity is just as vital as temperature in your wine cellar. Learn how to protect corks, prevent spoilage, and maintain the perfect balance year-round.
Jim Hopper
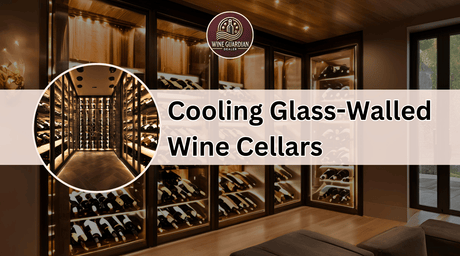
Learn how to cool modern glass wine cellars with precision. We break down thermal load, best systems, and real-world solutions from Wine Guardian Dealer.
Jim Hopper
🛒Shop our most-loved Wine Guardian cooling systems today.
🛠️Protect your wine with the most trusted systems on the market.
❤️Tested, reviewed, and loved by serious collectors like you.


Wine Guardian
Wine Guardian D025 Ducted Wine Cellar Cooling Unit


Wine Guardian
Wine Guardian D025WC Water Cooled Wine Cooling Unit


Wine Guardian
Wine Guardian DS025 Duct Split Wine Cellar Cooling Unit


Wine Guardian
Wine Guardian DS050 Duct Split System Wine Cellar Cooling Unit


Wine Guardian
Wine Guardian CS025 Ceiling Mount Wine Cooling Unit


Wine Guardian
Wine Guardian CS050 Ceiling Mount Wine Cooling System


Wine Guardian
Wine Guardian TTW009 Through The Wall Wine Cellar Cooling Unit


Wine Guardian
Wine Guardian TTW018 Through-The-Wall Wine Cellar Cooling Unit

Wine Guardian
Wine Guardian Sentinel Series Integrated Humidifier 99H0173-20

Wine Guardian
Wine Guardian Integrated Humidifier for Sentinel Series 99H0173-30

Wine Guardian
Wine Guardian Freestanding Humidifier For Use With Wine Guardian Units


Wine Guardian
Wine Guardian TTW04B Defender Through-The-Wall Wine Cellar Cooling Unit


Wine Guardian
Wine Guardian TTW02B Defender Through-The-Wall Wine Cellar Cooling Unit


Wine Guardian
Wine Guardian TTW01B Defender Through-The-Wall Wine Cellar Cooling Unit